3D Printing, Tricks
3D Printing: 10 tips and habits you need to know
Substantially improve the quality of your 3D prints by taking these simple recipes and tips into account.
3D printing is not an exact science. It has some art, some intuition, and a lot of experience. When you start in 3D printing, printing errors are common, and you end up throwing away half of what you print.
Over time, and after much trial and error, the user learns what he can expect from his 3D printer, his filament mark, and his own skills. Little by little, the rookie perfects his technique and learns to detect certain problems before they occur, considerably increasing his success rate.
To speed up this process and help you in the learning curve, we have compiled a list of 10 techniques and habits that you will have to acquire, and that the sooner you start to take into account, the sooner you will improve your 3D printings.
1. Watch out for ABS
Unless it’s really necessary, avoid ABS. A few years ago it was the most widely used material for 3D printing. Now, however, the PLA filament is used much more, because in addition to being biodegradable, it is easier to print: you do not need a heated bed, it suffers less warping or deformation, and it is less sensitive to temperature, air currents, etc..
If you still want or have to print using ABS, keep this in mind to limit its drawbacks as much as possible:
- The right temperature and configuration: The ideal temperature for each filament is different. Some brands recommend a higher temperature and others lower. We recommend that before trying other things, find out which is the recommended temperature for your filament, because an incorrect temperature is the cause of much of the poor prints.
- Heated bed: Also find out which is the ideal temperature for the warm bed, which will usually be in the vicinity of 90 ° to 110 ° C.
- A good way to avoid deformation is to lower the temperature of the warm bed after a few layers: The ABS will bend under too much heat, so after the first layers, once the adhesion to the tray has been achieved, it usually works well to lower the temperature of the hot bed a little.
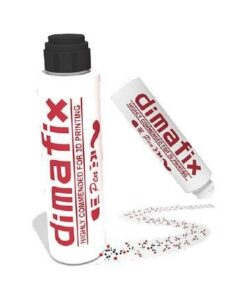
- Kapton or PET tape, PEI print surface, Dimafix, etc: ABS prints generally adhere better to Kapton tape than to a warm bed, and that’s why Kapton has long been used. Today there are specific products, such as Dimafix, which is especially useful: when heated, it becomes an adhesive paste. When cooled at the end of printing, it loses adhesion, so the part can be removed without problem.
- Use an ABS solution: Dissolving a small piece of ABS in 50 ml of acetone will get a paste that when applied to the heated bed will give you a lot of adhesion. Be careful not to use too much ABS for the mixture, as it will stick too much and give you problems.
2. Unsupported printing: the 45º rule.
Support material is something to avoid, because no matter how well we remove it, it will leave marks on the piece. Therefore, it is important to learn how to print optimizing as much as possible the possibilities of the printer to avoid the use of supports.
A good way to avoid supports is to use the 45-degree rule: if we keep the flown parts of our design below a 45-degree slope, we will eliminate the need to use support material and we will get a clean and uniform print. Above this inclination, it will be necessary to use supports, damaging the final result.

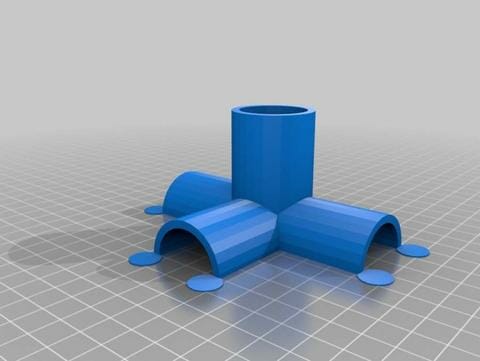
3. Include discs, buttons, etc. in the design:
If your design has small parts that may suffer during printing, such as the legs of an insect that must rest on the printing plate, include discs around the fine parts in your design. They’ll print better, and you can remove them later. Otherwise, if there is little support surface, they may peel off during printing and ruin the project.
4. Know the limits of the nozzle
Note that the nozzle through which the molten filament exits has a specific diameter. Below this diameter, the printer will not be able to print, no matter how hard you try.
Therefore, avoid printing objects with details smaller than the nozzle diameter. In general, the nozzle will print effectively at most twice its size, being also significant the distance between the dots, for example, a nozzle of 0.5mm will not be able to produce a line smaller than 1mm.
5. The temperature
Temperature is one of the most important factors to bear in mind.
On the one hand, printing with a high temperature we’ll get better adhesion between layers, less clogging, and possibility of a higher printing speed.
On the other hand, if we print with a low temperature we’ll have less possibility of carbonization, high quality bridges and pieces without stringing.
6. Printing speed
A good idea may be to use different printing speeds for each part of the object: the optimum speed for the outside is not the same as for the inside, of course. The more inside, the faster we can print, and the more outside, the slower, so as not to affect the final appearance of the design.
An optimal speed will be 15-20 mm/s for the outside, and 60-100 for the inside.
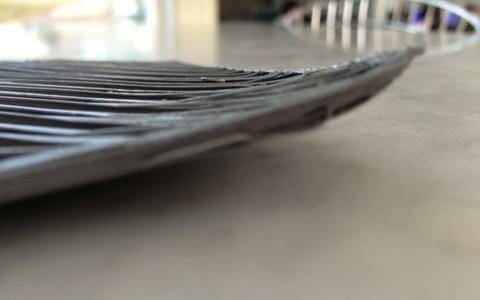
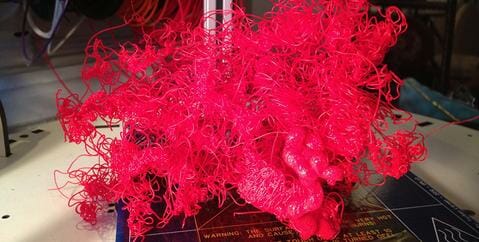
In addition, there is another technique we recommend you to use, which is to drastically reduce the printing speed of the first layer, to ensure that they melt and adhere to the base firmly. In the following image, a typical case of bad adhesion to the tray that you discover after 8 hours of printing.
7. Text in designs
With a standard desktop 3D printer, if your design includes text,
make sure it is at least 5mm high, which is equivalent to approximately 20 dots of font size (without scaling, of course).
If you use a smaller font, you may not get a good result. If you need to use a font size of 20 or less, it’s a good idea to use bold to make the text larger.
8. Tolerance
Often our designs are composed of several parts that will be joined once printed, tolerances need to be taken into account to ensure that the pieces will fit perfectly.
For example, to make sure a lid fits perfectly, the tolerance should be at least 0.25 mm to allow for expansion of the materials. Pieces with a looser fitting mechanism will accept tolerances between 0.4 and 05mm.
9. Placing the design in the printer tray.
Closely related to the above, it is crucial the way you place the design when you print it. A good design can be ruined by poor placement.
Depending on how you place the object, the printing will take more or less time. The higher the height of the object, the longer the print will last. Also, keep in mind that you can tilt the object, to reduce the tilt of the object below the 45º mentioned above.
10. Details obove
Details such as text will appear better if they are created on a flat surface under the nozzle, avoiding the printer having to work at a different level on the z-axis. So if your piece has details that you want to look good, it’s a good idea to set the inclination of the piece so that the detail or text is flat, perpendicular to the z-axis.
Note that the resolution of the 3d printer refers only to the Z axis, not to the X and Y axis. Orient your design.
These are just a few tips to improve your designs and prints. Soon we will provide another edition of tips and routines that will simplify your life. For now, you can start to implement these.

